35 STEPS
1. In this tutorial, you will learn how to setup your Stripe account to receive payments from payors on Ref Insight.
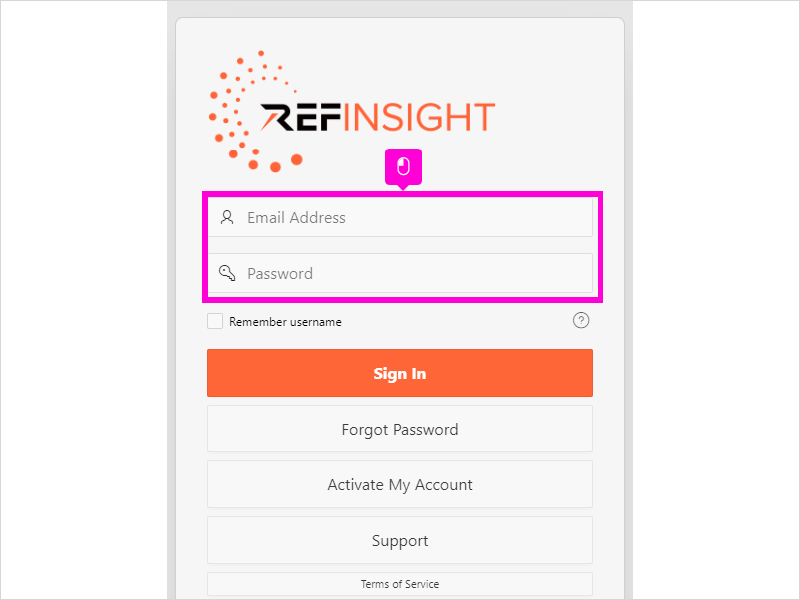
To start, login to the Ref Insight official's portal.
Enter your email address and password.
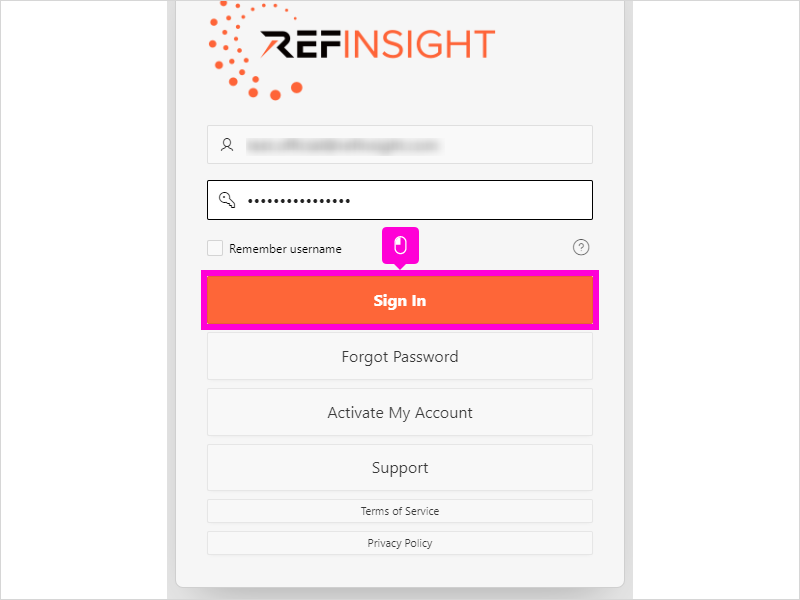
2. Once you have entered your email address and password, click Sign In to enter the Ref Insight official's portal.
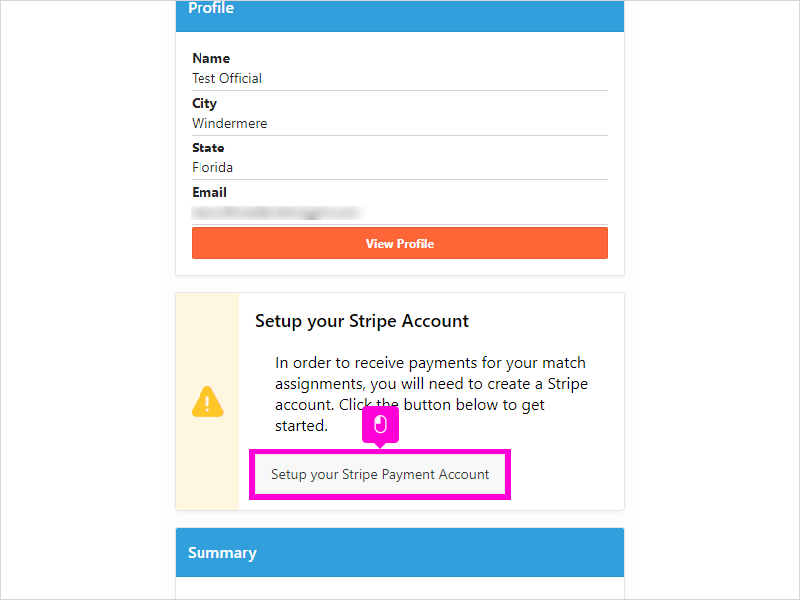
3. From the Ref Insight dashboard, click Setup your Stripe Payment Account.
4. Ref Insight has partnered with Stripe to provide our payment solution. The payments that you receive for the matches you work will be deposited into a Stripe Account registered under your name and email address.
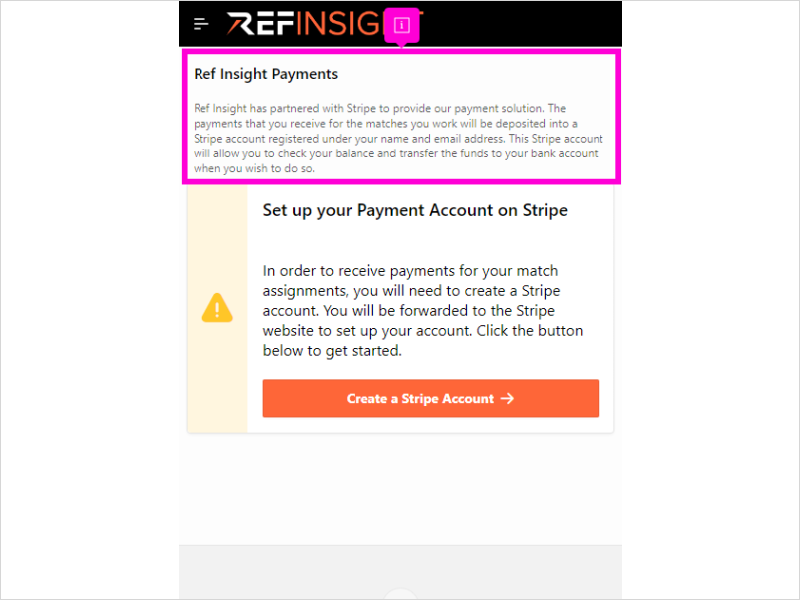
5. This Stripe account will allow you to check your Balance and transfer funds to your bank account when you wish to do so.

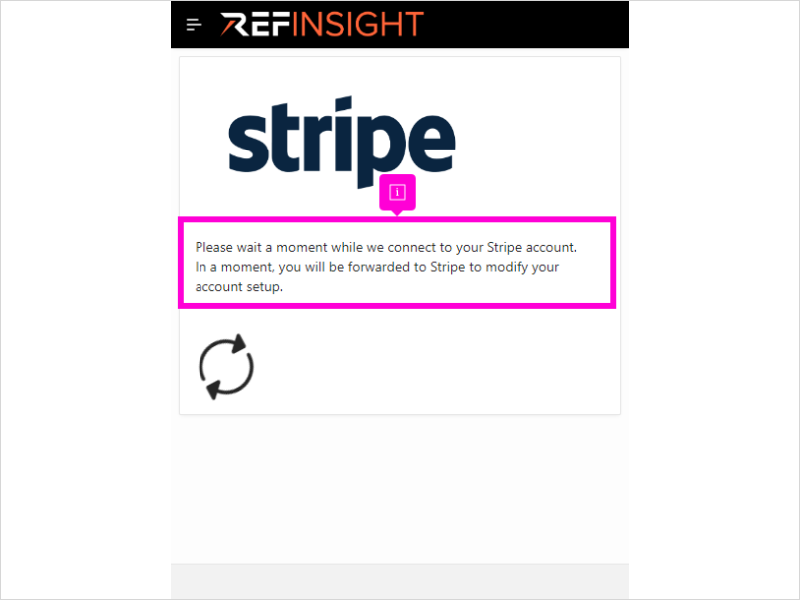
6. To set up your new Stripe account, click Create a Stripe Account.

7. Please wait a moment while we connect to Stripe. This may take a few seconds while your account is being created.
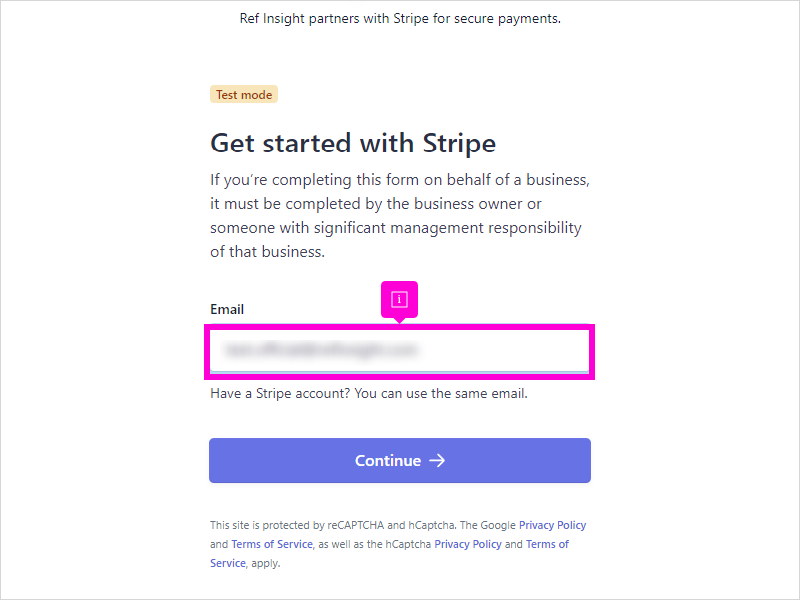
8. You are now in the Stripe onboarding system. The first step is to confirm your email address.
The email address should match what was provided from Ref Insight to Stripe.
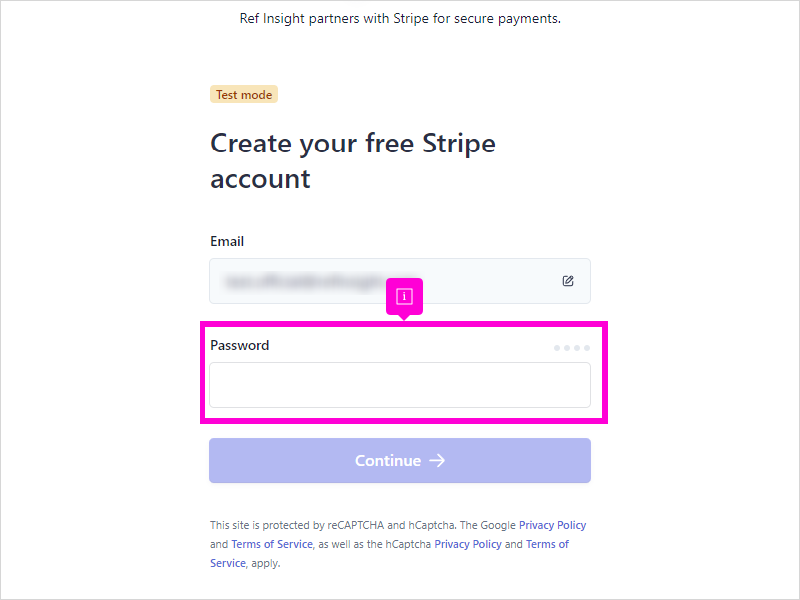
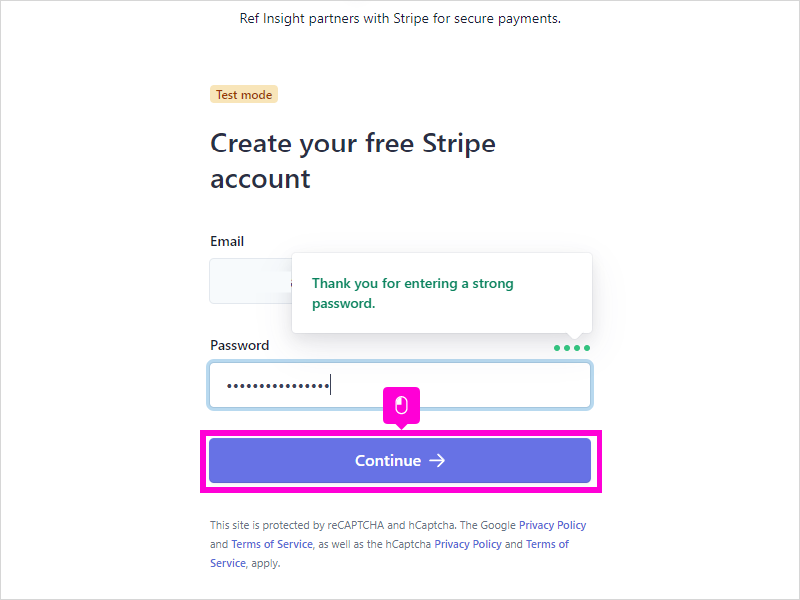
9. Create a password for your new Stripe account. You will need to remember this password so you can log in to your Stripe account in the future. You can access Stripe using their app, or through the browser on your phone or computer.
10. Click Continue
11. You'll need to enter a phone number for your new Stripe account. Stripe will send a text message to verify this phone number, so make sure you have your phone with you. You'll be asked to enter a verification code in the next step.
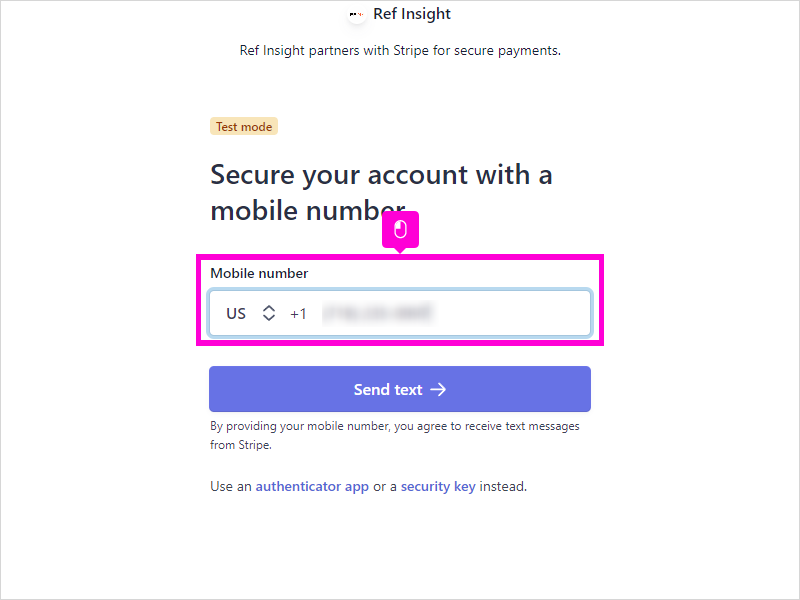
12. Once you've entered your phone number, click Send Text.
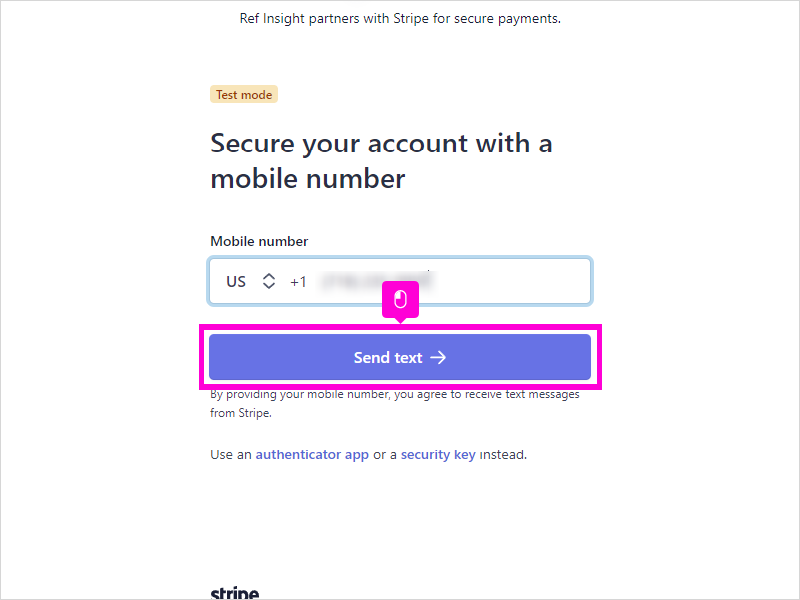
13. When you receive the text message from Stripe, enter the six digit verification code.

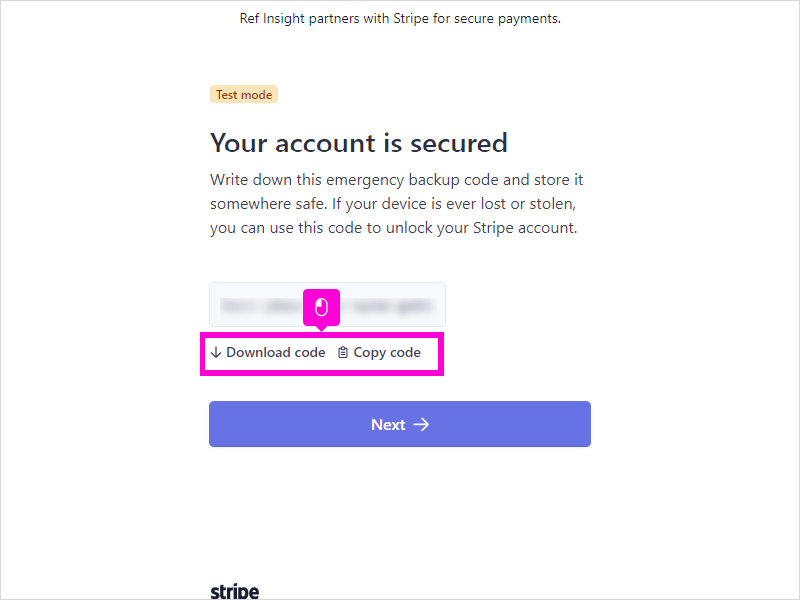
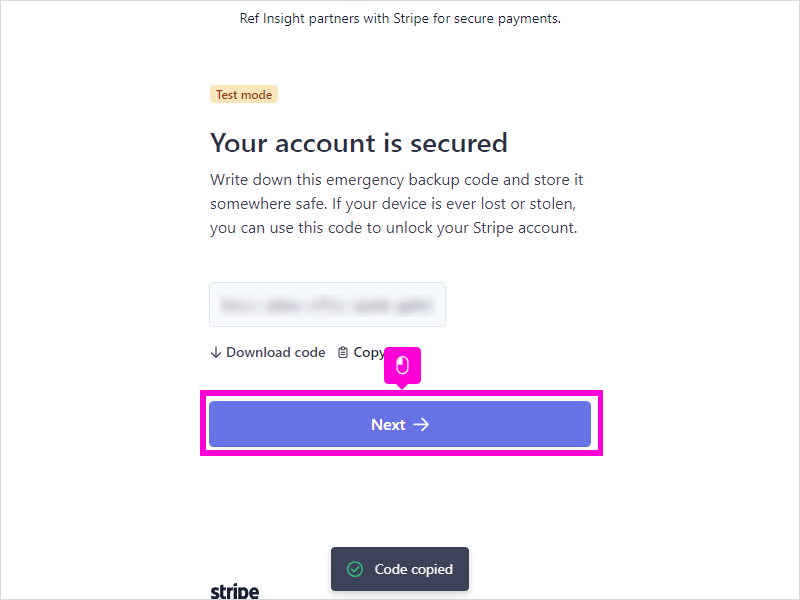
14. Download or Copy the account emergency backup code to someplace safe. This will be helpful if you ever have issues accessing your Stripe account in the future.
15. Click Next
16. If you are an Individual receiving payments, click Continue.
If you are operating as a business, for example an LLC, select the appropriate business type from the dropdown menu.
Scroll down and click Continue.

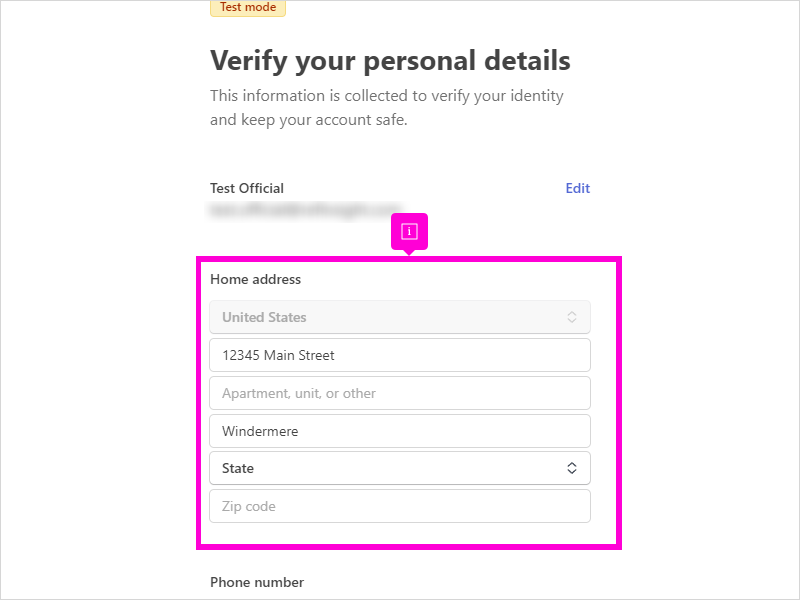
17. Update and confirm your home address. Please be accurate, otherwise Stripe may put a hold on your account.
If the referee is a minor (under 18), enter the personal details for the parent that is taking ownership of the account.
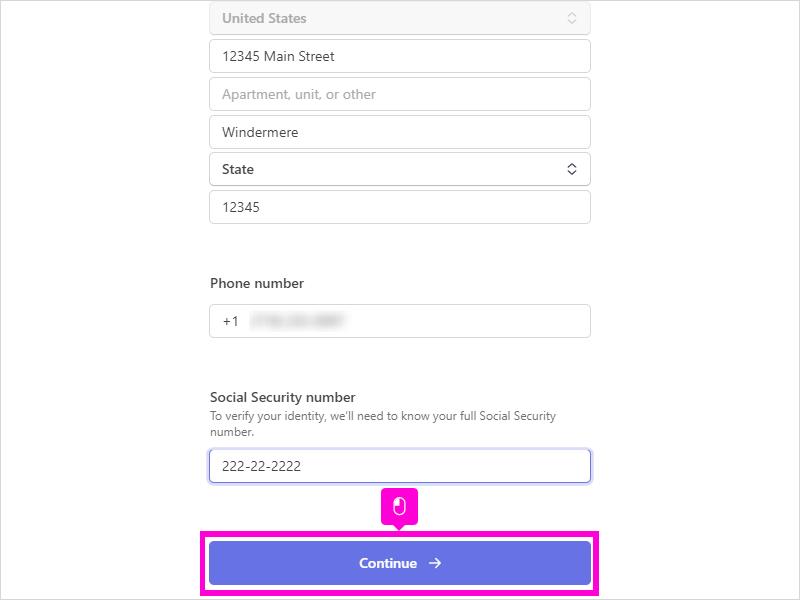
18. Next, enter a valid phone number.
Then enter your Social Security number. This needs to be accurate to pass Stripe verification. For minors, this is the SSN of the parent.
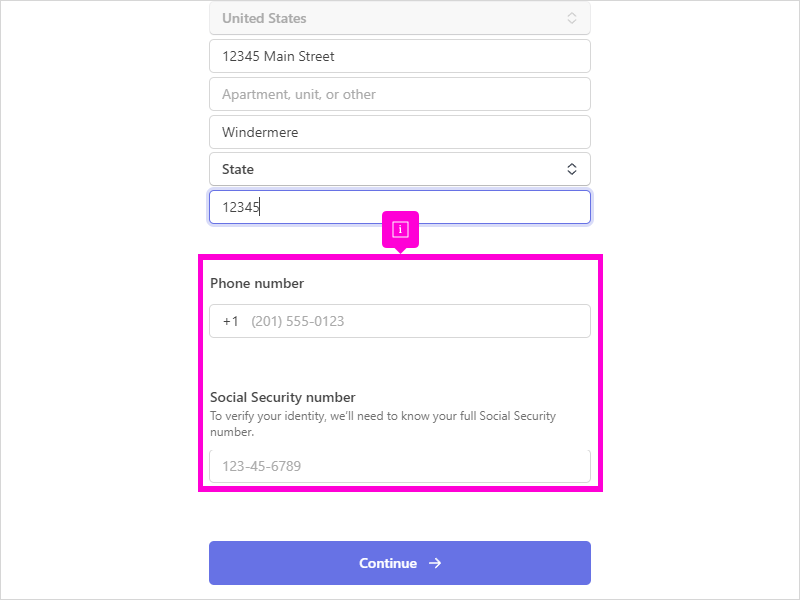
19. Click Continue
20. You are now connecting your bank account to Stripe so you can receive payouts in the future.
There are 2 options. One option is to connect to your bank directly. The other option is to add the bank details manually.
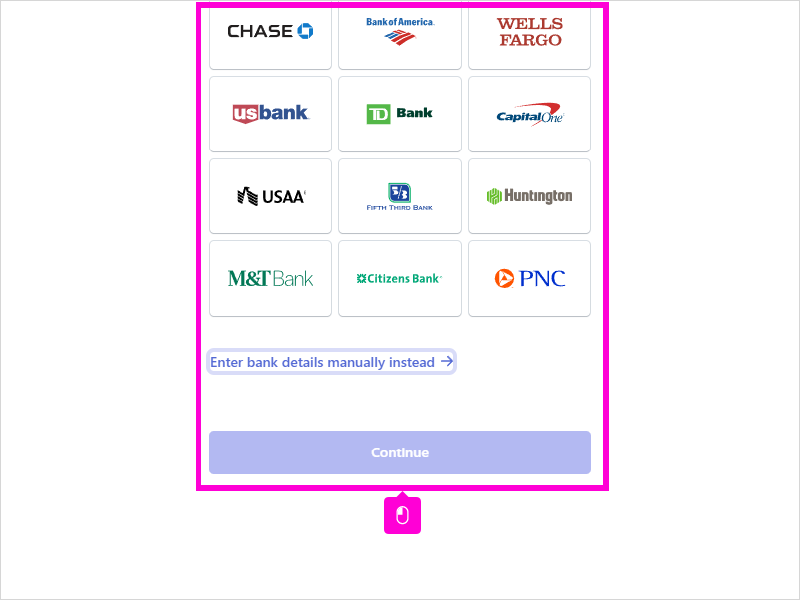
21. If you are onboarding through the Ref Insight app, you must enter your bank details manually.
Click the link to Enter bank details manually.
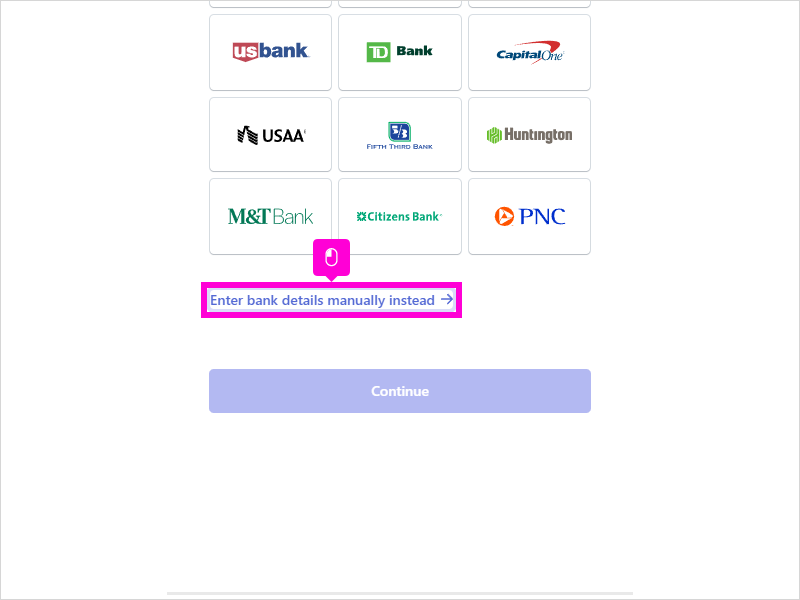
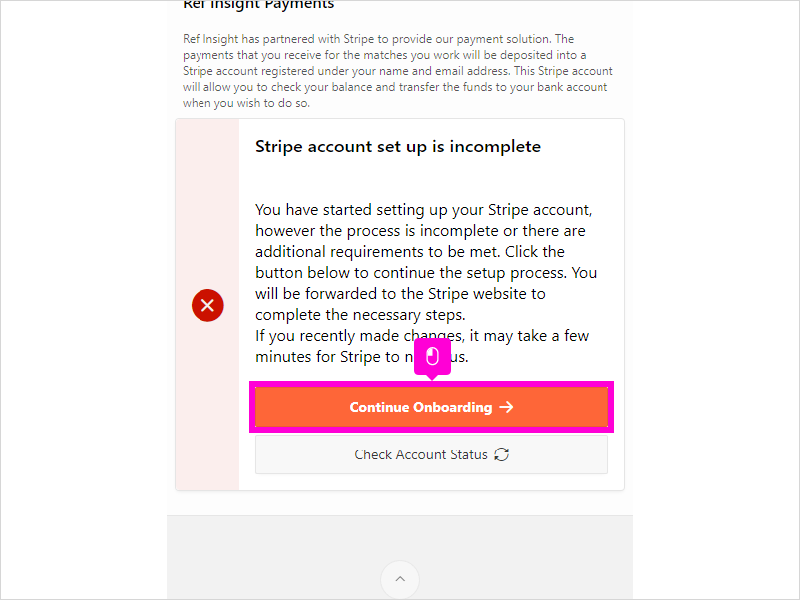
22. If your are onboarding through a browser, you have the option of connecting to your bank directly (assuming it is on the list of supported banks).
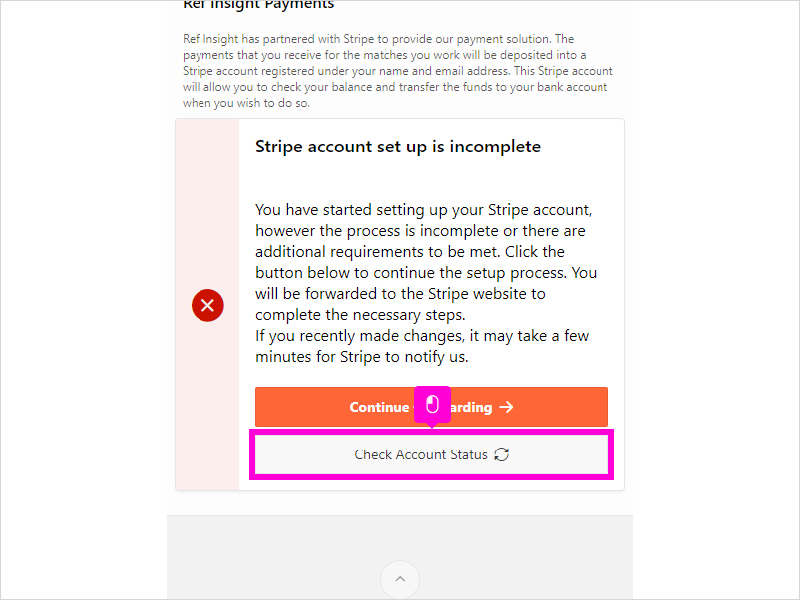
Click on the bank name.
If you are using the Ref Insight app, you must enter details manually.

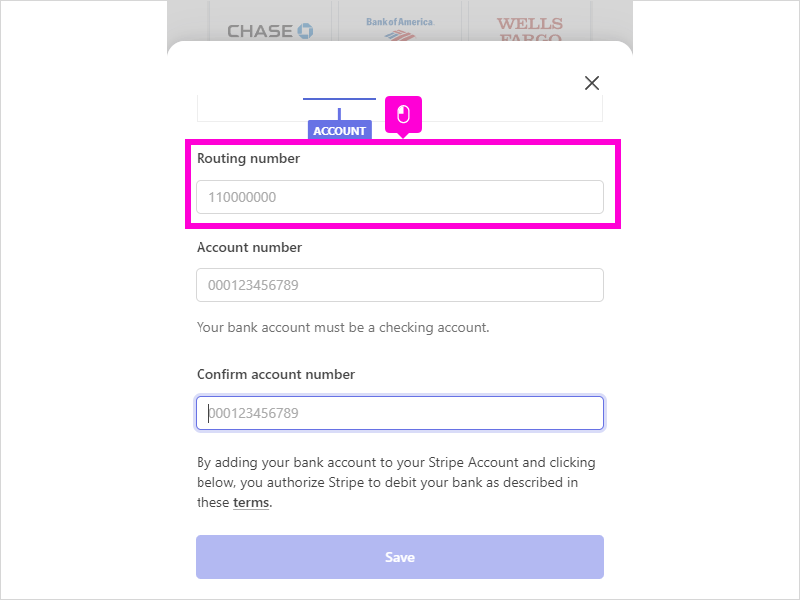
23. Add your bank's routing number. For minors, this can be the parents bank account or the minors bank account.
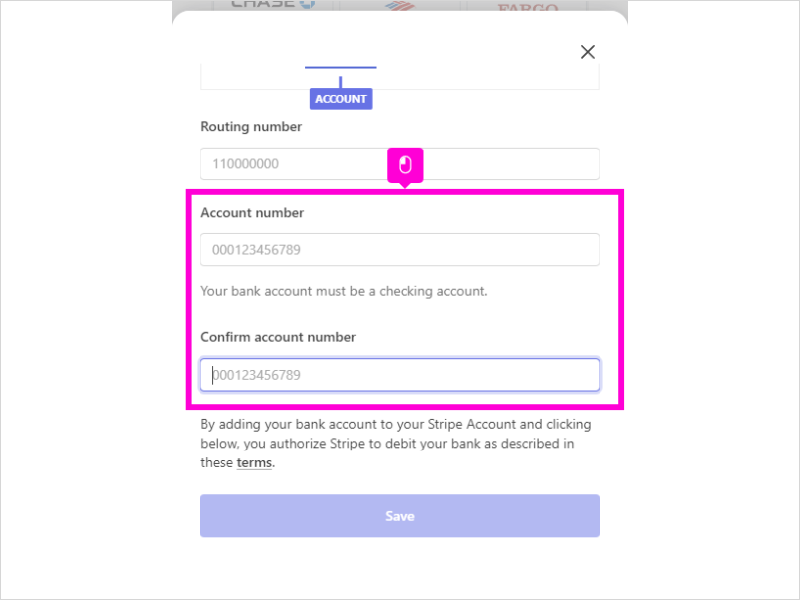
24. Add your bank account number.
Re-enter the number to confirm.
If you use incorrect numbers, you will run into errors when trying to receive a payout.
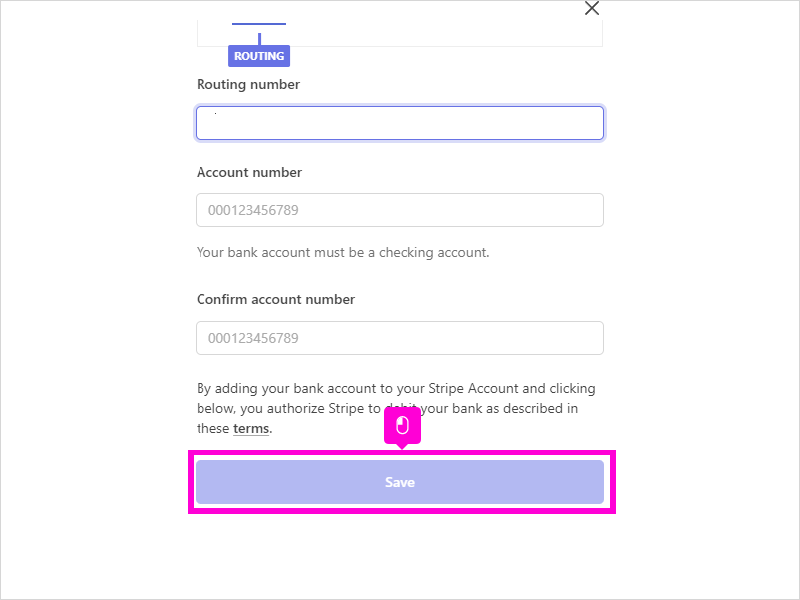
25. Click Save to complete the bank account step.
26. Stripe has a feature called "Link". This feature is not required to receive payments from Ref Insight payors. Click Not Now to continue.

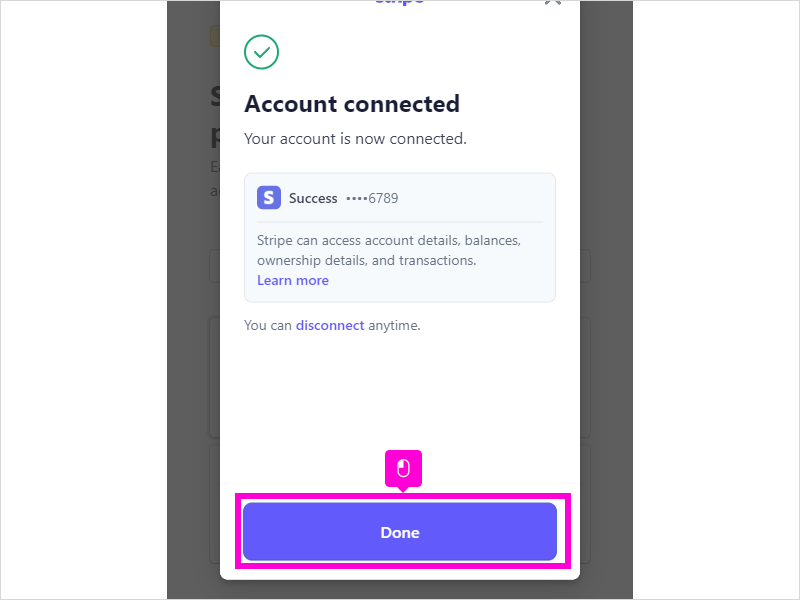
27. Your bank account is now connected to Stripe. Click Done
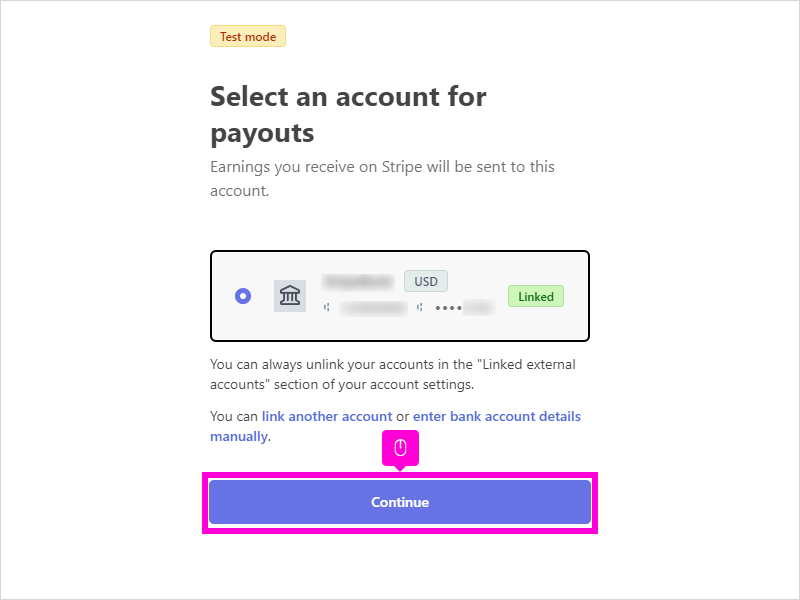
28. Confirm that your bank account is connected to Stripe, then click Continue.
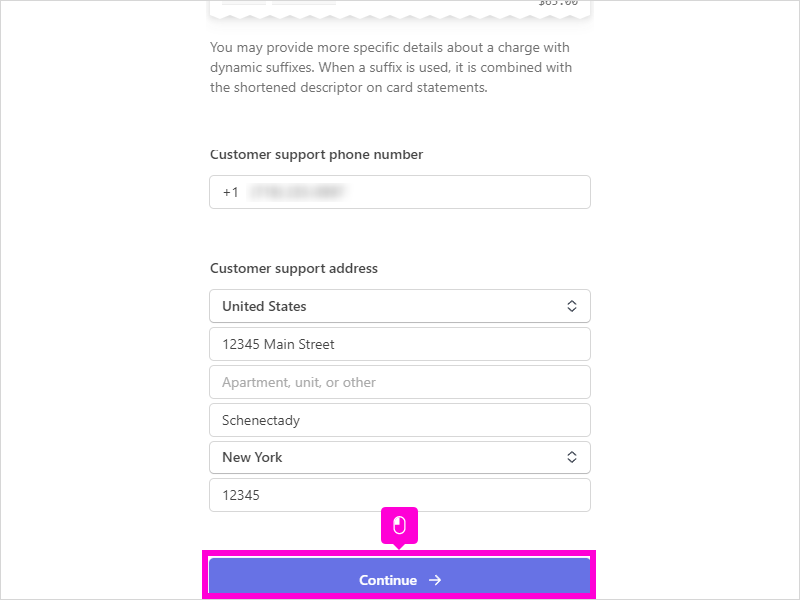
29. Confirm your information and click Continue.
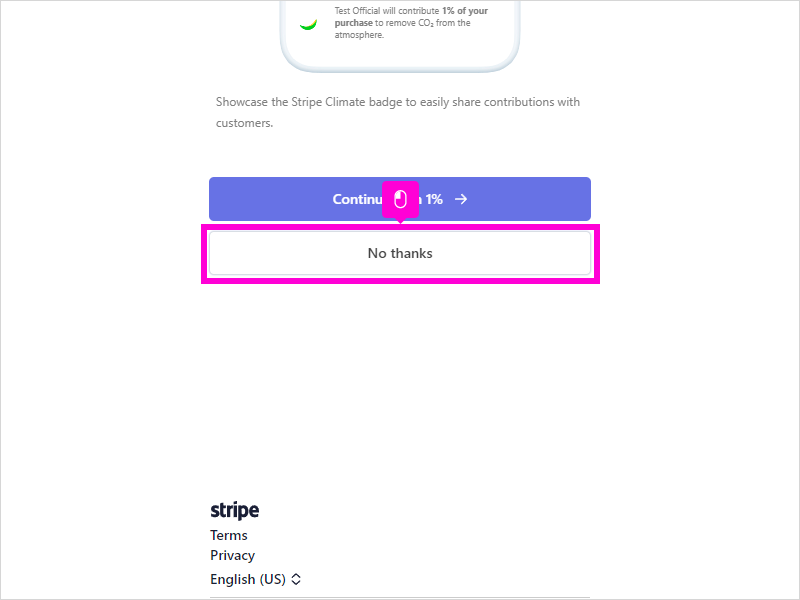
30. Stripe allows you to contribute to various Climate initiatives. You have the option to contribute, otherwise scroll down and click No thanks.
31. If Stripe needs to collect additional information, you will see a button to Continue Onboarding. Click that button to re-enter the Stripe onboarding system.
32. You can also click the button Check Account Status to see if Stripe has completed the verification of your account. It may take several minutes for Ref Insight to receive final approval from Stripe regarding your new account.
33. When your Stripe account is successfully set up, you'll see a Stripe Account Balance section on your screen.
This tells you how much money you currently have in your Stripe account. Since your Stripe account is new, you should have a 0 balance.
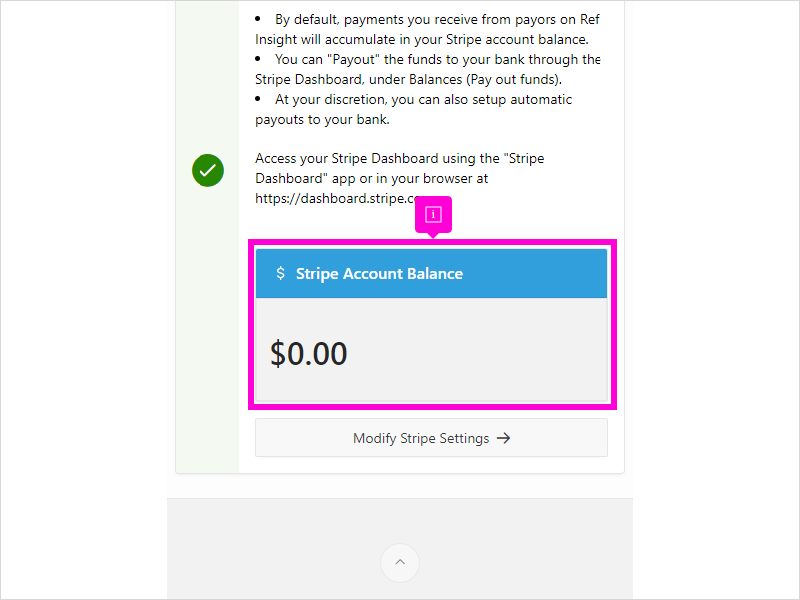
34. When you are paid for Assignments, this Account Balance will increase.

35. When you are ready to be paid out (send money to the bank), you would do that through your Stripe Dashboard.
Visit https://dashboard.stripe.com
This concludes the Tutorial.

